

INSTALLATION
Isotec Parete: a ventilated façade in a few easy steps
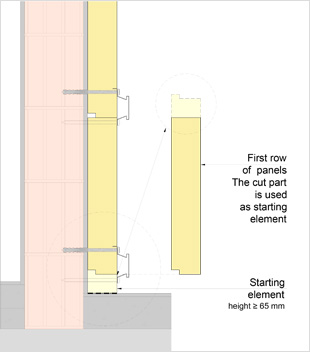 |
The panels are installed from the bottom upwards. The starting element is obtained by the cut of first row panels. The longitudinal stiffener and dovetail interlocking facilitate coupling. |
|
 |
The Isotec Parete panel is fixed to the supporting structure (brick or concrete wall, metal or wooden structures) with screw anchors, log bolt or tapping screws passing through the steel stiffener. Remembering to alternate the fastenings in the lower and upper part of the stiffener. Type and number of fastenings depend on the kind of supporting structure and on the weight of the cladding. |
|
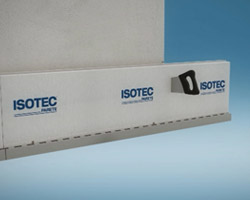 |
Where necessary, the polyurethane part of the panel can be cut with a simple saw and the metal stiffener with a disc blade. |
|
 |
The installation allows optimising the use of the material, without any waste: in fact, the excess part of each panel is reused to start the next row, thus realizing a laying with staggered joints, reducing waste to a minimum. |
|
 |
Free metal stiffeners (not coupled to the insulating panel) are used in areas where there is no support for fixing the cladding (e.g. near openings, edges, front summits, etc). |
|
 |
The butyl tape is applied on the joints between the panels and on the parts where the polyurethane is exposed. |
|
 |
The cladding is secured to the metal stiffener by means of suitable mechanical fasteners (self-tapping screws for wood or fibrocement, stoneware clamps, rivets for HPL sheets, etc.) |
|
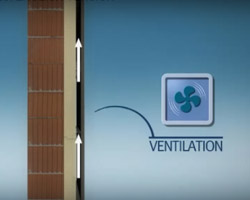 |
Once positioned the cladding, the ventilated chamber is generated. |
THE INSTALLATION OF THE THERMAL INSULATION SYSTEM FOR VENTILATED FACADE
Headquarters
Brianza Plastica SpAVia Rivera, 50
20841 Carate Brianza (Italy)
Tel. +39 0362.9160.1
Fax +39 0362.990457
info@brianzaplastica.it
Loading/downloading of goods
Viale Lombardia, 22
20841 Carate Brianza Italy
P.iva: IT00698250966
Capitale sociale: 3.000.000,00 i.v.
Reg. Imprese: n. 00865040158
Rea: MB/602163
Privacy policy
Privacy customers & suppliers


